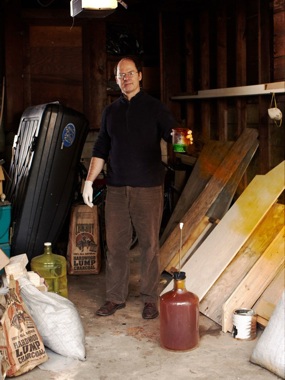
DIYbio and its more professionally oriented cousin, Garage Biotech, are undergoing a revolution at present. Essential equipment that used to cost thousands is now available at affordable prices, in many cases under open licensing schemes and open to community development. Knowledge of biology, genetics and the procedures underlying it all is being disseminated in ever-more-abstracted forms to make it easier to get started. And soon, even the biological components: strains, enzymes and substrates, will likely become mass-marketable.
It’s an exciting time to be involved in the development of tomorrow’s technology, and sometimes I find myself stepping back to consider what we have, and what we still need. I may as well share these musings with others to spare them the time, and perhaps to inspire someone with the know-how to fill in the gaps and help make this happen.
Prepare for a long, long post.
Equipment
Basic Liquid Handling – Have!
Although there has been no obvious effort to generate an Open-Hardware version of these tools, micropipettes are now available inexpensively on Ebay and Aliexpress. Likewise, bulb-type pipette fillers (rubber bulbs that you squeeze to fill and manipulate rubber valves to empty) and plunger-type fillers (roller syringe-arrangements) are available from ebay and aliexpress.
There is often talk of making a liquid handler robot; the most likely candidate would be a modded Makerbot, perhaps a drop-in liquid handler that sits on the Z-stage instead of the makerbot plastruder module. Nobody has yet designed a feasible, affordable liquid handling system for DIYbio, but it probably won’t be long. The next question is how necessary such a system would even be for most individuals, but we’ll leave that unasked for now.
Sterilisation – Have!
Autoclaves are too big and too expensive for individuals to buy or build. Community design of an autoclave is unlikely to happen, because of liability and safety issues. Thankfully, autoclaves are just giant pressure cookers; use of a normal culinary pressure cooker is sufficient to sterilise things well enough for science. One might require several pressure cookers to meet demand in an active lab, however.
The problem arises with larger containers and tools, such as pipettes and 500mL-1L erlenmyer flasks, etc.: these simply will not fit in a culinary pressure cooker! Although larger versions can be had to fit such equipment, they are sold as “Lab equipment”, which naturally means the suppliers start to charge ludicrous margins at that point.
Use of concentrated bleach is supposedly an effective means of sterilising glassware such as pipettes, although it poses a unique safety hazard and disposal issue. Also, the unwitting may think to mix their bleach, peroxide or solvent waste which is a bad, bad idea. Keep chemicals separate, people. However, when needs demand, a bucket of bleach will do for sterilising awkward glassware, and a quick rinse with sterile water and denatured ethanol will prepare them for use: just keep them in a container you’ve sterilised also (perhaps an autoclavable plastic bag that you can seal?
Aseptic Equipment – Have!
The natural continuation of sterilising things is keeping them sterile; in labs, either bunsen burners or laminar flow hoods are used to keep work sterile. The former works by establishing a closed convection loop of sterile air, and bunsen burners can be found that are simply mounted onto camping-burner cardridges.
The latter can be simulated by placing room-scale HEPA filters such that the outflow blows directly downward onto the work-bench, but issues with things blowing away may arise. A creative person might create a DIY laminar flow hood from modified furniture, somewhat like mushroom-growing hobbyists do already, or simplify their job even more by using a room-air purifier and a cabinet. Make sure to get a good brand that has a very fine filter, because ideally what comes out the other end is absolutely free of spores.
Whether using a bunsen or a hood, it makes sense to have an air purifier or two working in your labspace anyway, to keep the ambient air fairly clean to begin with. The less particulate matter might screw up an experiment in the absence of aseptic equipment, the less likely your hacked aseptic hardware is to fail you.
It also makes sense to have UV lamps fitted in your labspace and inside your hacked flowhood. When you are leaving the lab, put these UV lamps on a timer for an hour or two to sterilise surfaces and destroy any stray bits of DNA that might be hanging around. These guys can come back to haunt you by contaminating cell transformations later on, and UV lamps are a cheap, sustainable way of keeping your surfaces clean.
Finally, if you’re dedicating a room to your biotech hobby, it would make sense to dress appropriately. Wear low-dust clothes, wear a natural-fibre* labcoat over this, and tie back hair or wear a hair-net. Obviously, always wear clean gloves; sterilise with a 70% ethanol spray or an alcohol-based antiseptic hand gel.
*Natural fibres are a better idea where there is a risk of ignition, like in a lab, because they do not shrink and stick to you when they catch fire. Use a cotton labcoat with press-snap buttons so it can be torn off in case of chemical spills or fire.
Incubators – Don’t Have!
These are large, expensive and cumbersome. They are also unlikely to be easily produced to a fully satisfactory standard by the average hobbyist. Fortunately many bacteria do not strictly speaking need incubation, and it is likely that whatever organisms become the norm for DIYbio will be among those that lack a strict temperature requirement.
If you do want to grow bugs that prefer the warmth, consider Aquarium supplies your friends. Many aquarium heaters will heat water to a little above 30C, and even this “limit” can be worked around if one bought a tunable heater. Be sure to couple the heater with a small water pump to homogenise the temperature, and you’ll have a reasonably reliable water bath at incubation temperatures for growing cultures. This is obviously better for flask/tube grown cultures than petri dishes.
One way I can forsee for the community to develop an easy-to-use and easily-installable incubator is to create a circuit board that uses a trace heater element like that on the Makerbot heated build platform, with two small dials; one for temperature, and one that chooses roughly the volume of the area to be heated to help define PID parameters in the arduino firmware. The board would then be attached to an arduino, powered by a micro-ATX supply, and simply placed in the volume of space to be heated. The trace heater on the makerbot board can exceed 100C, so this should be more than sufficient to heat a chamber to incubation temperatures! I ought to kickstart this discussion on the DIYbio group.
Thermal Cycler – Have!
Until recently, it seemed every third person involved in DIYbio was personally dabbling in thermal cycling, trying to recreate their own peltier-thermal cycler at home. I made my own stab at it a few months ago.
Thankfully, some geniuses (Tito Jankowski and Josh Perfetto) in San Francisco have founded OpenPCR and are actively prototyping an Open-Hardware design for a peltier thermal cycler, which they will then be selling for (planned) $400. The design currently accepts 16 tubes, and they claim a ramp speed of 2C/s, more than many commercial machines and more than sufficient for PCR (in fact, many protocols call for deliberately slower ramp speeds..).
I’ve already ordered one through the OpenPCR Kickstarter fundraiser, and hopefully in a few months I’ll have a working DIYbio-built thermal cycler to test out.
By way of making great connections where they are due, these guys are also heavily involved in setting up and fundraising for the very amazing Biocurious, perhaps the first dedicated hackerspace for Biotech. They are also fundraising on Kickstarter for this lab, so if you like the idea go help out!
Gel Electrophoresis – Have!
Thanks again to the good folk of San Fran, because Tito Jankowski and Norman Wang are selling an excellent electrophoresis kit through Pearl Biotech. This is a great example of a superior product from the community, because I’ve never seen a comparable offering from industry.
The Pearl gelbox requires a separate power supply, and a camera to take pictures of the results. But aside from that, it’s an all-inclusive design that marries band visualisation to actual migration of DNA, and allows you to cast gels in the rig simply by rotating the gel-boat by 90 degrees (the rubber gaskets at the ends of the boat form a seal). Because it’s designed specifically for Sybr-Safe, it comes with a blue transilluminator and an orange filter. In theory, you could simply leave the blue lights on and watch your bands migrate in real time!
And, it’s only €200 or so for a mostly assembled kit, requiring only basic soldering.
Centrifuge – Have!
Although second-hand centrifuges can be bought on ebay, they are often still very expensive and very heavy to ship. For a dedicated hobbyist, it’s probably a worthy investment in terms of capacity and safety.
However, for those on a budget who are willing to take the risk, I designed a centrifuge rotor that is mounted on a Dremel tool, which I called (aptly I think) “Dremelfuge”.
Dremelfuge is pretty hazardous, in that it’s a naked rotor spinning up to six tubes at up to 33,000RPM (which is 52,000g, by the way). But, for those willing to take that risk, it’s a functional centrifuge for sale on Shapeways for under €70 (costs may vary by location, so I don’t know what price you’ll see. I see €54).
There is also an edition with a post for a chuck instead of a recess for a dremel; just in case you would rather spin it with some other tool. I haven’t tested the chuck version on anything significant, so I can’t speak for its reliability or safety.
Protein Purification Apparatus – Don’t Have!
Extracting and purifying proteins from cells is sort of necessary for effective production of things like enzymes, which might be a garage requirement for people who can’t afford expensive enzymes, or a critical part of research.
The options are many, and are summarised pretty well on the wikipedia article on protein extraction. However, unique requirements of each protein mean that a single, easy method for all use cases is unlikely. Perhaps the easiest answer for most of us would be a homebrew solvent-based lysis buffer followed by centrifugation to remove cellular debris, but the supernatant will contain all sorts of proteins including proteases, RNAses and perhaps DNAses which will post obvious problems for extraction of DNA-altering enzymes.
If the protein is transgenic, then things are a little easier; make sure you attached a His-tag, and buy some centrifuge-friendly nickel-affinity columns. Figure out how to equilibriate, wash, elute and clean the columns and they’d probably be OK for re-use.
What is needed here, however, is a robust, DIY-friendly chromatography rig or an alternative protocol that works for a majority of cases. Perhaps a system based on electrophoresis of protein would work nicely for those who already own a gel rig (see above). Perhaps a differential centrifugation step for those with a centrifuge. It’s unlikely to be a clean-cut part of the hobby..
Storage – Don’t Quite Have..
So, we have -20C freezers in most houses. It’s easy to freeze stuff, but make sure to buy a frost-free freezer and keep cold-packs in there to buffer your important samples against freeze/thaw damage. However, things aren’t as simple as just freezing; there’s different kinds of freezing, and cells require the most annoyingly precise freezing of all.
Although proteins are stable at -20, cells like to be kept at -80. The reason for this is that lethal ice crystals are less likely to grow and lyse cells at lower temperatures, where water ice takes on a different structure. In order to better protect cells, we usually freeze cells with “cryoprotectants”, the most common and easily accessible of which is glycerol at upwards of 40%.
There is an experiment ongoing by one helpful member of the DIYbio group into small ceramic or glass toroid beads, of the sort that you thread necklaces with, in combination with glycerol, as a storage medium for -20C cell stocking. Cells are scraped from a plate, suspended in a little liquid, and shaken all over the beads. Then excess liquid is withdrawn leaving a cell-rich film over the beads.
This is based on my observation of a fellow microbiologist storing her stocks in a commercial kit that is based on small ceramic beads of this sort, and our hypothesis that the curved surface of the beads helps to prevent ice crystal formation. This method, if it works, would be an excellent option for DIYbio, because the ingredients and requirements are very easy to achieve.
Finally, if you really need -80C you can probably fake it by keeping a well-insulated polystyrene box in the freezer and topping it off with dry ice beads every few days. You’ll need a supplier of dry ice and the commitment to constantly make sure it’s not evaporated away. You’ll need a lid to prevent the comparatively toasty -20C air from evaporating all your dry ice. Not a screw-on tight lid, because then your container might explode, but a lid that will keep the air inside static.
The other option is pricier but likely to work well once established; use of a hard vacuum to lyophilise cells into a powder. I am led to understand that this is a highly reliable way of storing cells, but it requires a powerful vacuum pump and ideally a -60C/-80C stage between the cells and the pump where water vapour can condense before it corrodes the pump’s innards. You could achieve this with a bell jar and some dry ice, I suppose, but the cost of the vacuum and the hazards of a hard vacuum give me pause. For long-term storage, there’s no contest, but it might have to be done by DIYers by asking a favour of a local microbiologist with a professional rig in their lab.
Spectrophotometry – Don’t Have!
Measuring DNA, RNA, Protein and Cell Optical Density requires a spectrophotometer or spectroscope. The absorbances vary between 230nm and 320nm, and the equipment is still very expensive second hand.
In principal, a community-built “spec” shouldn’t be too difficult to design; you need a UV source (a bulb?), a light path through a UV-permissive cuvette in which the sample is diluted, and a range of photodiodes that respond to specific frequencies. Or something like that, I’m only passably fluent in electronics. Point is, it shouldn’t be hard to design, so I think it should be an area of active focus for those involved in DIYbio who know more about electronics.
Without a working spectrometer, measurements of DNA quantity can be roughly made by comparing a sample on a gel to a standard of known concentration/intensity. I can’t offhand think of a convenient way to check the OD of a bacterial broth, though I ought to disclose that in my time working in a lab I’ve never had to. But then, I’ve never grown anything for reasons other than plasmid preparation, and proper rigorous study of a transgenic microbe vs. the wild type would call for growth-curve analysis by OD measurements at defined timepoints. Without a spec, you simply can’t do this sort of science.
Consumables
Broths for Bacteria – Have!
Although you can buy broth powders on ebay, you can also make bacterial broth/media yourself using off the shelf ingredients. It’s satisfying and fun to do, and costs barely anything! I used it to successfully isolate and culture the glowing bacterium Photobacterium phosphoreum, and it worked out very well.
So if you’re too cheap to buy the readily available powder, you can always make your own.
Chemicals and Solvents – Varies
Depending on your country, you can either easily source solvents and chemicals for essential tasks in the lab, or you can’t. Oddly enough, one of the least accessible solvents is also one of the most necessary and least toxic; Ethanol, or “drinking” alcohol. This is because (surprise surprise) there are many idiots who would drink themselves to death immediately if they could get high-purity ethanol. Especially where I’m from.
The easiest way to find out whether it’s legal to purchase certain chemicals in your country is to call a supplier and ask them what is required from their buyers to satisfy legal requirements. In Ireland, it turns out that you need only be a private company to qualify for purchasing any chemical required for biology. I consider it highly ironic that it is easier and cheaper to purchase potentially lethal high-molarity hydrochloric acid than to buy ethanol.
Disposal can, annoyingly, be more of an issue than procurement. Post-biotech chemicals pose a serious ecological hazard and may not be legal to dump or drain where you live (neither should they be). You will probably have to collect your chemical wastes in inert plastic containers and contract your supplier to dispose of them safely. Remember to pay close attention to what waste goes where; mixing things like bleach and acetone can be a recipe for disaster. Best to keep your solvents separate where possible, which may even aid the disposal crews in recovering and recycling solvents in some cases.
There is a need in DIYbio to establish exactly which solvents are surplus to requirement, however; many solvents are considered necessary for routine tasks in the lab, but is this because they are indispensible, or because they are the most convenient option in labs with access to them? What can we do without or substitute? Some time ago, Meredith Patterson brought up the possibility of doing a Phenol/Chloroform extraction of DNA with Ether instead of Chloroform, because the latter was not readily available in pharmacies where she came from whereas Ether was. I may have missed the outcome and will have to try and follow up on this one; solvent replacement is an interesting area that calls for some serious work.
It is my opinion and that of one Brian Degger that biotechnology is destined to become a benign science requiring few or no artificial or non-biodegradable chemicals. I don’t think we’re there yet, but I think we can transition that way through creative substitution and research into alternatives.
Plastic and Glassware – Have!
It’s easy to buy lab plasticware and glassware on ebay and aliexpress, so this isn’t an area that needs work. It does behove the DIYbioer or Garage Biotechnician to try and use glassware where possible, to cut down on expendable costs and pollution. The amount of plastic waste in the average lab today is pretty sickening, and disposal of biohazardous plastic is incompatible with recycling.
As mentioned above, most glassware can be sterilised by autoclaving in pressure cookers, and the larger pipettes and erlenmyers can be bleach/sterile water/alcohol treated to sterilise them, and then kept in a sterile bag until needed.
Enzymes – Don’t Have!
This is the biggie. Enzymes are expensive, prone to degradation, come with an expiry and may not even be legally available to you despite carrying virtually no hazards in the main. Companies selling enzymes often refuse to sell to individuals, which may be a choice of theirs or a legal requirement (as in Germany, I am told).
It falls to the community to solve this issue by focusing early efforts in established labs on producing easily purified enzymes for routine tasks; the key enzymes for biobrick assembly, a high-fidelity polymerase such as KOD, Ligase and Phosphatase.
Of course, it then falls to the community to also create buffers for each enzyme which can be easily created and distributed as concentrates to hobbyists worldwide. Time will tell how long this will take. Ultimately, some things cannot be reasonably produced by individuals or even the average garage lab; dNTPs and ATP are an example of something pretty far out of reach for DIYbio or Garage Biotech to produce in-house, so someone will have to apportion this from wholesale supply or mix up buffers for everyone.
Agarose, Sybr-Safe, Running Buffer, Loading Buffer – Sort of Have
Ok, so we can homebrew a loading buffer from glycerol and certain food dyes, so that’s not a priority. In fact, commercial loading buffers probably have too much salt for sodium-borate based gels, which are the most practical solution.
We can even replace Sybr-safe with methylene blue from aquarium stores, although the former is by far preferable for more accurate and sensitive results, and works really well with a Pearl gelbox (see above). You can probably buy Sybr-Safe easily enough, and because it requires no special disposal procedures it works out cheaper than the apparently less pricey ethydium bromide.
However, Agar just doesn’t work nearly as well as Agarose; the real-deal is pretty much necessary for trustworthy gel runs and predictable results. Unfortunately it’s pretty expensive, so it might be nice to try and make a transgenic bug that produces pure agarose, so that it can be homebrewed by hobbyists. For want of such a back-room DIY solution, agarose must be purchased. It can be had from ebay or from individuals on DIYbio who can buy in bulk and resell sachets.
The other difficulty is in procuring the running buffer that is used to make the gels themselves and then to run them in the rig. The cheapest option is to buy sodium borate and use that to make cheap running buffer, although watch out for racing ladders! Because a sodium borate gel is so low in salt relative to many ladders and loading buffers, the high-salt ladders can race through the gel and mix up results. Sodium borate is also known as borax or disodium tetraborate pentahydrate.
The other option is to buy some uber-expensive TAE or TBE buffer, though this is fraught with issues also. TBE can mess with downstream enzymatic reactions because of the larger amounts of borate, and the EDTA in both buffers is a highly damaging environmental pollutant. Both buffers also suffer issues with overheating and require lower voltages, so they take longer. The single upshot is that you can expect commercial ladders to run normally in them.
Perhaps the community would also benefit from a “ladder” strain of bacteria which carries a plasmid that can be cut several ways to produce a nice ladder of equal salt content to other samples, making the cheaper sodium borate option more useful?
Cultures
Labs strains, mutants and wild type bacteria are always welcome in a lab. It’s true that you can get buy with only what you have on hand, but the ideal lab workhorse is E.coli strain K12 because it is so excellently understood and studied. However, biosafety becomes an issue if you want to collect microbes.
Microbes are rated 1-5 on the Biosafety/Biohazard scale, where 1 means that they pose no threat to human, animal or crop, even the immunosupressed. Things get riskier as you go up the scale, and generally require licenses.
Interesting biosafety 1 microbes include Photobacterium phosphoreum, Gluconacetobacter xylinum, and Dienococcus radiodurans, all three of which are likely to be easily extracted from things you can procure without difficulty (respectively seafish, kombucha pancake-cultures or rotting fruit, and sun-baked dust). Finding these bacteria in your neighbourhood may require help or instruction from a protocol, which is discussed below as a general requirement in DIYbio.
For more “pedigree” strains, there is no reason that biohazard 1 strains can’t be shared in the post. Be sure to do this above-board; after securing your bacteria carefully within the packaging, label the outside clearly with the words “Non-hazardous biological sample”. Several of my colleagues at an academic lab have transferred cultures like this and have encountered no trouble, even when posting to the USA.
The idea that a community might retain a database of who and where to seek culture X was proposed on the DIYbio mailing list, and this “Cloud Cultures” idea may develop into a community effort as worldwide DIYbio labs with their own storage solutions start to become a reality.
Skills and Protocols
This area doesn’t require much breakdown. The area of DIYbio aims to spread knowledge and competence in Biotechnology to interested amateurs and professionals seeking more economical or practical means to practise their science. For this, we need to establish “DIY-able” protocols for a number of routine tasks, and also some interesting ones.
I personally enjoyed writing up a “how-to” of producing bacterial broth and isolating a fascinating, glow-in-the-dark bacteria with it. What surprised me however was how much interest it gathered when I presented it at Maker Faire, as did Brian Degger’s writeup and demonstration of DNA extraction using household ingredients. People like to see science, but people like even more the idea that they can do science and take part. It’s at the heart of DIYbio as a movement.
Engaging writeups of scientific procedures that are not only interesting but also practical and didactic will help get people involved, but to prevent them becoming unmoored and drifting on, we need a robust foundation of practical instructions on how to take things further and start doing real science. We need a “Biohacker’s Guide to Biohacking”.
Take Home Message
There are a few things above that stand out as immediate, achievable aims that should be met ASAP. It would be great to get a trace-heating Incubator board going, because that’s a mail-order solution to a common stumbling block. Likewise, if it isn’t difficult to dream up a spectrophotometer, DIYbio needs this soon too.
The other take-home is more positive; most of the above is immediately achievable. For less than €1000, you can probably buy all the equipment and consumables needed to start doing microbiology experiments. If it’s legal to do so where you live, you can probably also start buying the solvents, chemicals and enzymes needed for more in-depth molecular work.
Hell, Mrgene.com accept payment by credit card and deliver DNA plasmids in the post. Calcium chloride (readily available on ebay) can be used to render cells competent for transfection using a centrifuge, which can in turn be had for less than €70. You barely need any special equipment to make your first GMO nowadays, so why wait if you’ve had a great idea?